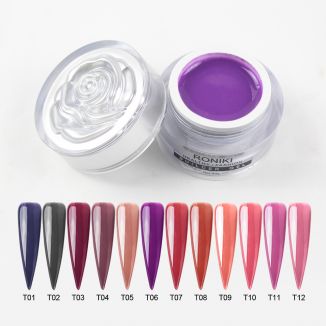
Nail art gel has revolutionized the world of manicures, allowing individuals to create stunning and long-lasting designs that can withstand the test of time. Unlike traditional nail polish, which may chip or fade after a few days, nail art gel provides a durable finish that lasts much longer. This article will explore how nail art gel can create beautiful, long-lasting designs and provide tips on achieving the perfect manicure.
Nail art gel is a gel-based product used to decorate and enhance the appearance of nails. Unlike regular nail polish, it requires curing under a UV or LED light to harden, making it much more durable and resistant to chips and scratches. Nail art gel is versatile and can be used for various nail designs, from simple solid colors to intricate patterns and 3D artwork.
One of the most significant advantages of nail art gel is its durability. Traditional nail polishes often chip or peel off after a few days, but nail art gel provides a much stronger and longer-lasting finish. The gel bonds firmly to the nail, ensuring that your design stays intact for up to two weeks or more. This makes it ideal for individuals who want a manicure that can withstand everyday activities without losing its luster.
Nail art gel delivers a high-gloss finish that enhances the overall appearance of your manicure. Unlike traditional nail polish, which can dull over time, nail art gel maintains its shine throughout its lifespan. The smooth texture of the gel also provides a flawless surface for intricate designs, ensuring that every detail is sharp and well-defined.
Nail art gel is incredibly versatile and can be used to create a wide variety of designs. Whether you want to create simple, solid-colored nails or intricate patterns with multiple layers, nail art gel allows for endless creative possibilities. The gel can be easily manipulated to create various textures, such as matte, glossy, or even 3D effects. Additionally, the gel's thicker consistency makes it easier to sculpt designs like flowers, lines, or geometric patterns with precision.

One of the key benefits of nail art gel is the curing process, which involves exposure to UV or LED light. This curing process instantly hardens the gel, allowing you to complete your manicure much faster than with traditional nail polish, which requires waiting for it to air dry. The quick curing time not only saves you time but also ensures that your design remains intact and doesn't smudge.
In addition to creating stunning designs, nail art gel also provides strength and protection to the natural nail. The gel coating acts as a shield, helping to prevent your nails from breaking or chipping. This is particularly beneficial for individuals with weak or brittle nails, as the gel adds an extra layer of support, helping to maintain the integrity of the nail underneath.
Before applying nail art gel, it's essential to properly prepare your nails. Start by cleaning your nails to remove any dirt, oils, or previous nail polish. Then, shape your nails and push back the cuticles for a neat, even surface. This will ensure that the gel adheres better and lasts longer.
Applying a base coat is crucial for achieving a smooth and durable manicure. The base coat helps the gel bond to your nails, preventing lifting and ensuring long-lasting results. Be sure to apply a thin layer of base coat and cure it under the UV/LED light before moving on to the gel color.
Once your base coat is cured, it's time to apply the nail art gel color. Use a thin brush or applicator to apply the gel in even layers, ensuring that each layer is thin and smooth. Avoid applying too much gel at once, as this can lead to uneven curing and a bulky finish. After each layer, cure the gel under the UV/LED light before applying the next layer.
If you want to create intricate designs, now is the time to add your artwork. Nail art gel can be used to create various patterns, such as stripes, dots, flowers, or even 3D designs. Use fine brushes or nail art tools to create the details, and then cure the gel to set the design in place.
To protect your design and give it a glossy finish, apply a layer of top coat gel. The top coat helps seal the design and adds an extra layer of durability, preventing the gel from chipping or fading. Once applied, cure the top coat under the UV/LED light for the final touch.
After curing the top coat, cleanse your nails with a gel cleanser to remove any sticky residue. This will leave your nails looking clean and polished, with a smooth, glossy finish that lasts for days.
In conclusion, nail art gel is an excellent choice for creating long-lasting, beautiful nail designs. Its durability, versatility, and glossy finish make it the ideal product for achieving professional-quality manicures at home. By following the proper application techniques and taking care of your nails, you can enjoy stunning designs that last for weeks. If you've tried nail art gel before, we’d love to hear about your experiences—feel free to leave a comment or ask any questions you might have!
Previous: None
Next: None
Comments
Please Join Us to post.
0